Halo 3 Finish the Fight Roblox Id
Halo 3: ODST Guide - Walkthrough
Data Hive
Mombasa Streets
Character: The Rookie
Objective: Locate Secret Archway to search for Captain Dare
Outset by post-obit the arrow on your compass to the Beacon. When y'all reach the Buoy zone, printing upwards on the D-Pad to retrieve a marking onscreen pointing to the Underground Archway. Approach the door the marking is pointing to and hold the RB button to start the level.
Data Hive
Character: The Rookie
Achievements: Information Hive, I Like Burn down (kill 10 enemies with Flamethrower).
Objective: Find Dare on sublevel ix
Hop down to the area below. Actuate VISR and expect around. Pick upwardly the Plasma Pistol next to the dead Grunt if yous don't already accept ane, also as the Shotgun and ammo past the expressionless officers. Once you're suited up, continue through the unlocked door at the northeast end of the area.
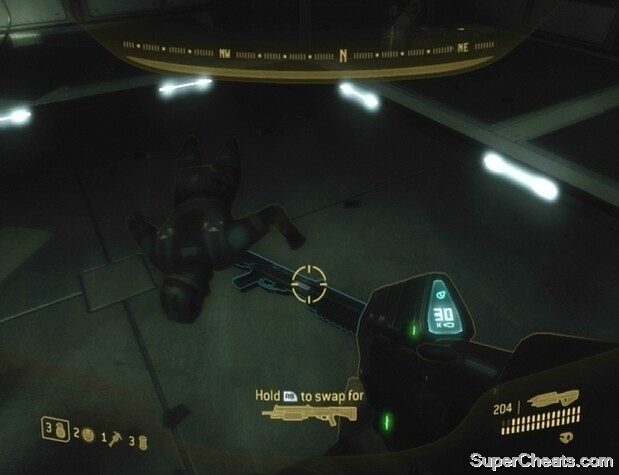
Grab the Shotgun by the dead officer earlier continuing on.
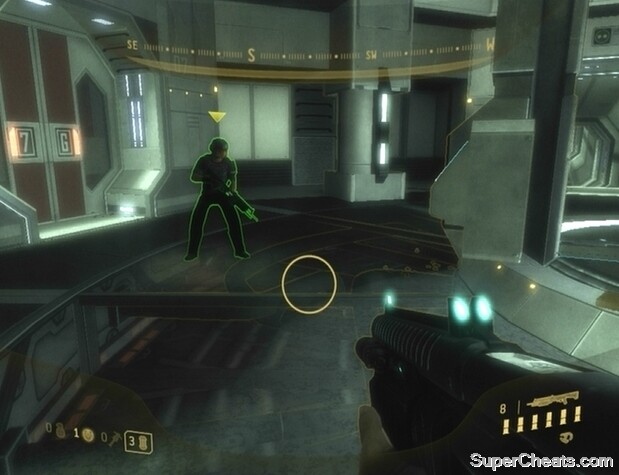
Make your way to the very stop of the corridor, killing whatever Grunts you lot come beyond along the style, and go along through one of the unlocked doors to enter the next corridor. You'll encounter three Jackal infantry at the start of the corridor. There is plenty of cover leading up to the Jackals, so move upward from embrace to cover to get close. Use your Plasma Pistol to dissolve a Jackal's shield and then plug him with the Shotgun. There's a pack of Grunts toward the end of the corridor; take them out and then go along through the unlocked door at the southwest end.
In the beginning circular room, leave through the passage to the southeast. A Brute, a couple of Grunts, and a Jackal will confront you equally you enter the 2d circular room. Be ready with a charged Plasma Pistol, hit the Beast to remove his armour and so stick him with a Plasma or Spike Grenade.
Grab the health pack past the start of the southwest corridor if need exist. At that place is a Fauna Helm armed with a Brute Shot and some Grunts in the room at the terminate of the corridor. Hitting the Animate being with a charged Plasma Pistol shot, stick him with a Plasma or Spike Grenade, and then have to the Grunts.
Keep through the northeast corridor to meet up with a friendly NMPD officer. Arroyo ane of the computers on either side of the data-stick and hold the RB button to enhance it. Some Drones will then fly up; boom them with your Shotgun and drop downwards to sublevel 8.
Interact with one of the monitors to enhance the data-stack and then drop down to sublevel 8.
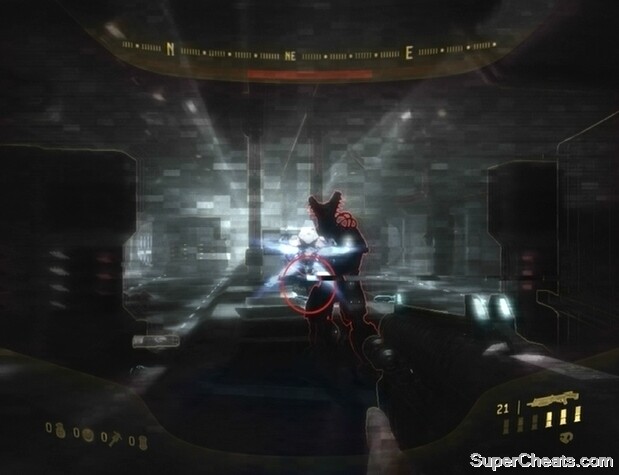
In sublevel viii you can restore your wellness using the wellness pack along the due north wall if necessary. Swap your Plasma Pistol for the full one by the dead Drone next to the southeast door and look around for some Shotgun ammo to the left. Start down the southeast corridor and blast the two Drones up alee. There are three Brute Stalkers up ahead, so take VISR active to detect them (outlined in orange). Use your Plasma Pistol to remove their armour and then stick them with a grenade or blast them with your Shotgun.
Fight your mode to the cease of the corridor and leave through the door at that place. Use your Shotgun to impale the Drones as they fly into the room through the southwest corridor. With the Drones dead, swap your Plasma Pistol for 1 of theirs and grab the health pack by the southwest corridor if yous're wounded
There are some Jackals and perhaps a Brute in the circular room at the end of the southwest corridor. Use your Plasma Pistol to deliquesce each Jackal's shield and then smash them with your Shotgun. Hit the Brute with a charged Plasma Pistol shot and and then stick him with a grenade or throw a Frag Grenade at his anxiety while he'southward stunned.
One time in the next room, start down the southeast corridor to spot another group of Covenant. This group is equanimous of Grunts, Jackals, and i or two Brutes. It's quite easy to stick enemies while they're in the center of a narrow corridor such every bit the ones that connect each round room, then try to use your stock of grenades to kill the Brutes while they target your ally. Exist sure to collect any grenades dropped by enemies later on each encounter.
Stick stunned Brutes with a Plasma Grenade or Spike Grenade after a charged Plasma Pistol shot.
Three more than Brutes—two minors and a Creature Helm—will come through the southeast corridor when you lot reach the adjacent circular room. Take them out with a couple of well-thrown grenades or your Plasma Pistol and Shotgun and so exit the next room past the southeast corridor. Dispatch of the next batch of enemies you run into in the same fashion. When the room is clear, wait for a health pack forth the due south side of the room. The Grunts will well-nigh probable accept dropped some Plasma Grenades and at least one Plasma Pistol, so collect those earlier starting downwards the southwest corridor to encounter—you lot guessed it—even more Covenant.
With the terminal batch of enemies dead, approach i of the monitors on either side of the data-stack and hold the RB push to raise it. Then, equip your Shotgun and drib down to sublevel 9. A group of Drones will wing through the southeast corridor before long later you enter sublevel 9. Blast them with your Shotgun and so bandy your Plasma Pistol for a fresh one dropped by one of the Drones. When the room is articulate, go along through the southeast door.
Making it through this next stretch of corridor is a bit of a hassle considering yous're pitted against and then many Brutes. If yous have a decent stock of grenades and a Plasma Pistol you should exist fine. Showtime by using your Plasma Pistol to remove the armour of the Animal surrounded by Grunts at the get-go, and while he is stunned stick him with a grenade or throw a Frag at his feet to kill him. Use your Shotgun to boom the scurrying Grunts and collect any Plasma Grenades they drop. There's a health pack y'all tin grab on the platform across from the door you used to enter if necessary.
Fight your style through the Brute-packed corridor.
Proceed down the corridor and you volition soon encounter a grouping of Brutes. There is enough of encompass along this corridor, and so be sure to utilise it to your advantage. Move from cover to cover to get in range of ane of the Brutes and then hit him with a charged Plasma Pistol shot to remove his armour. While he is stunned, stick him with a grenade or throw a Frag Grenade at his feet to kill him. If you run out of grenades, you can instead quickly run in with your Shotgun and finish the Fauna off after removing his armour. As you fight your way down the corridor, go along an eye out for Spike Grenades dropped by Brutes.
Most troublesome of all is the Brute War Chieftain at the end of the corridor. He's armed with a discrete Plasma Turret and requires quite a flake of gunfire to take downward. A charged Plasma Pistol shot will not remove his armour only it will stun him momentarily, assuasive you to motility in with your Shotgun for a couple of hits or to lob a grenade at his anxiety. Definitely use the cover to your advantage and don't be afraid to fall back toward the commencement of the surface area to recover your Stamina.
If lesser Brutes remain after the War Chieftain's death, pick up his Plasma Turret and use it to apace impale them off. Before moving on in that location is a Flamethrower nearby that will definitely come up in handy, and is also the key to unlocking the "I Like Burn down" Xbox 360 accomplishment. Follow the paragraph below to locate the Flamethrower.
The Beast State of war Chieftain is armed with a Plasma Turret.
Achievement Tip -- I Like Fire: Afterward killing the last Animate being in the corridor, continue northeast. You'll soon come to a decline merely ignore it and keep heading northeast to the frost-covered expressionless-end. Look for the Flamethrower by the officer'due south corpse behind the see-through cover in the eastern corner.
Unlocking the I Like Fire achievement.
Accomplishment Tip -- Audiophile: If you collected all 29 Sound Logs in New Mombasa, the NMPD officer volition have followed you down to sublevel 9. Normally he remains on sublevel 8 and dies. To find the terminal Audio Log you must have kept the officer alive through the Brute corridor. When the last Fauna falls, follow the officer to a locked security door. When he heads through, follow him in, activate VISR and look for the device in the corner of the room. Activate information technology to unlock the Audiophile achievement. The NMPD officer will so turn hostile; he's armed with a Shotgun, so kill him quickly.
Sound Log thirty/30 (See Audio Log Locations Folio for more)
When you have the Flamethrower (even if you're not later the accomplishment, bringing it along would definitely be a good idea), continue down the southeast reject. You won't encounter anymore enemies in this corridor, then just go on on into the next area. The next corridor is empty as well, so proceed through to the other end. This next stretch contains more than 10 enemies, assuasive you to unlock the Flamethrower achievement if you and so choose. Be conscientious, however, as such a large amount of enemies means an even larger amount of gunfire headed your way.
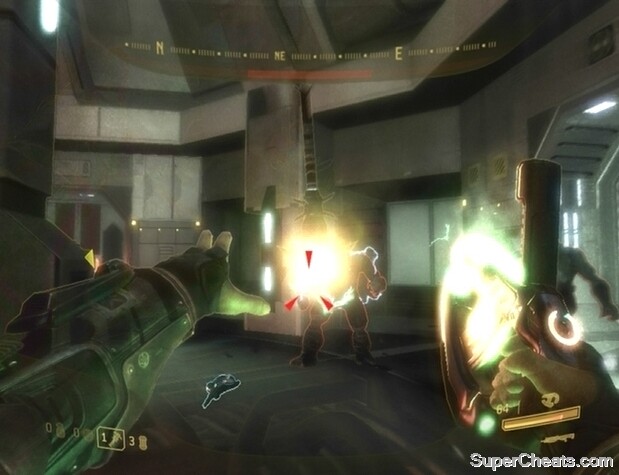
Showtime by ducking behind the comprehend to your left. The Flamethrower has crawly range, and so transport a burst of burn toward whatsoever enemies y'all can spot from behind cover. While using the Flamethrower there is no need to go along RT held down the entire time, and doing then is sure overheat the weapon. Just tap RT with enemy is in your sights and provided that enemy is within range, he should presently be set aflame. Start by targeting the Jackals and Creature earlier taking to the Drones. The Jackals volition nigh probable be at the forepart of the cardinal platform at the kickoff, allowing you to set them aflame past quickly ducking out of encompass and sending a burst of burn their way. Once an enemy is on fire he is pretty much washed for.
When the Brutes and Jackals accept been taken care of, motion out and target the Drones. With total Stamina y'all should be able to articulate the room fairly quickly while sustaining minimal impairment. When you have the achievement, employ the Flamethrower to finish off any remaining enemies and approach the door at the southwest end of the room.
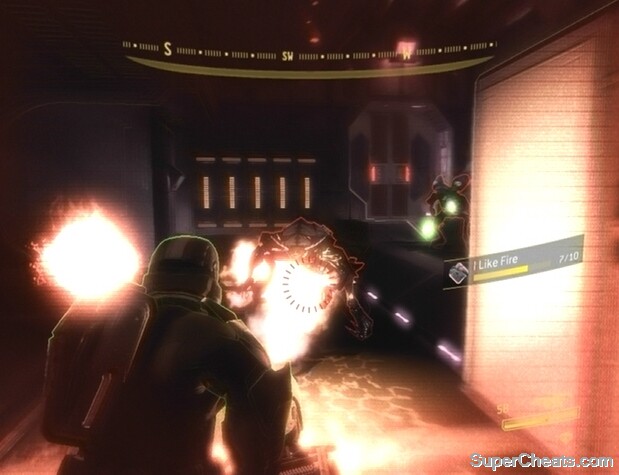
Become 10 kills with the Flamethrower to unlock the "I Like Burn down" Xbox 360 achievement.
When the door opens, proceed through and move to the stop of the corridor. Concur RB to knock on the door there to trigger a cutscene and complete the objective.
Objective: Fight through hive to data-heart
Follow Helm Cartel back through the corridor and you will shortly come across a Brute and a couple of Grunts. The Flamethrower can make short work of them, but motility from encompass to cover to get shut. There is another Animal and some more Grunts farther up. Help Captain Cartel eliminate them and then continue following her. Use the Flamethrower to eliminate the Brute, Jackals, and Drones you encounter. Captain Dare will rush past most of the enemies, so feel costless to follow suit.
Drop downward the pigsty you come to and grab the health pack by the door. There are more Brutes, Jackals and Grunts here. Your Flamethrower should still have plenty of juice if you've been using it sparingly. Just be sure to move upwards from cover to encompass to become shut to your enemies rather than making a beeline for them.
Follow Dare into the next area and you'll soon reach an elevator. Approach the panel and hold the RB push button to activate the lift. Continue following Dare onto the span. When you come to the swarm of Drones, use what'due south left of your Flamethrower to scorch them. If your Flamethrower runs out, drop information technology and switch to your Shotgun. There are a lot of Drones so you'll exist taking a lot of fire; be sure to duck backside the weapon racks or any other piece of cover along the bridge to recover Stamina.
A Shotgun will brand brusque work of Drones.
Equally y'all follow Cartel to the other end of the bridge yous'll come across more swarms of Drones, so keep your Shotgun loaded at all times. Fight your way to the other terminate of the span to reach sublevel 10. Grab the health pack next to the door if need be earlier heading in.
Objective: Rescue Superintendent
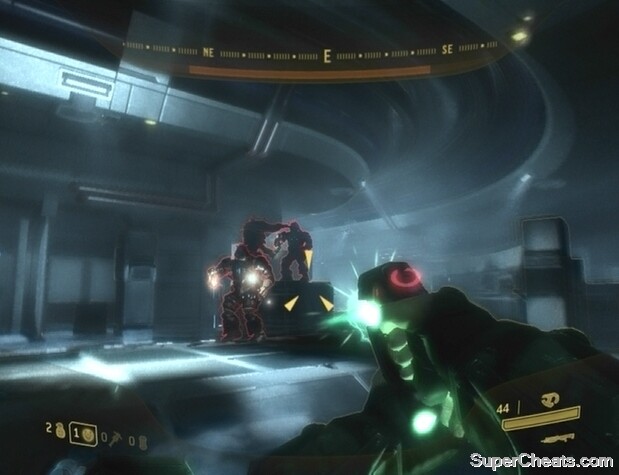
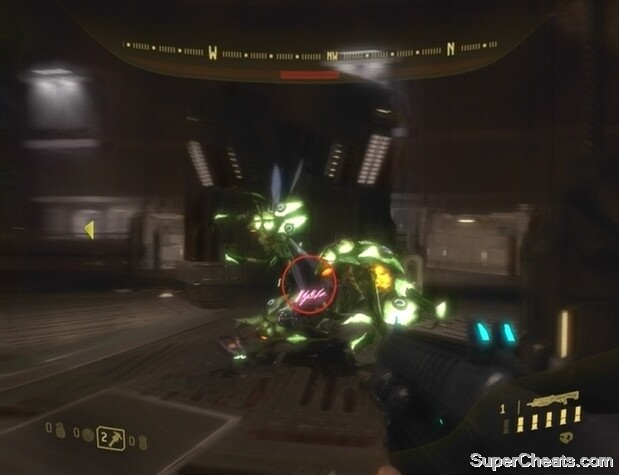
Go on post-obit Dare down the corridor and and so down the hole y'all come to. Outside, y'all'll find 2 Brutes and a Brute Chieftain armed with a Gravity Hammer at the other end of the area. The Brutes are busy trying to break through the door; if you accept a supply of grenades, stick the 2 Brutes shooting at the door and then immediately fallback to avoid the Brute Chieftain. The Plasma Rifles the Brutes were using can exist used to rapidly remove the Animate being Chieftain's armour; grab i while the Brute is preoccupied with Dare and continuously fire at him until his shield is lowered. Then, switch to your Shotgun and finish him off when the opportunity arises.
Killing the Brutes and Brute Chieftain to rescue the Superintendent.
Choice up the Gravity Hammer dropped by the Brute Chieftain when he falls, as it will surely come up in handy. Continue through the door once you're granted admission and go on to the door at the end. Hold the RB push button to admission the data-center.
Objective: Escort Engineer to safe
For this part you'll have to stay close to the Engineer, every bit it can be killed if it sustains besides much damage. With the Gravity Hammer in hand you should exist able to clear away most of the enemies yous come across without much effort. Movement from cover to comprehend to get close to your enemies, however, rather than merely making a beeline for them.
There are some Bound Pack Brutes on the bridge, and so kill each one as yous encounter them. You'll also run into a Brute Helm, some Grunts, and some Jackals. Use the embrace along the bridge to avoid taking fire or to recover when your Stamina is depression. When yous reach Buck at the other finish of the span, proceed through the door and drib down the hole to reach sublevel 12.
There are idle Drones hanging from the ceiling at the start of this corridor, so actuate VISR and be ready for them with your Shotgun. If 1 of your weapons is out of ammo or low on ammo you can trade with Cadet for his Assail Rifle. If you lot accept a completely empty weapon, swap it for one of the weapons dropped by the Drones and trade it to Buck.
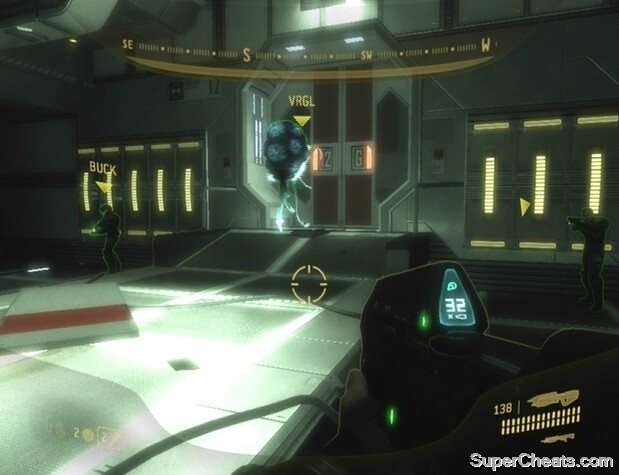
Defend the Engineer!
You'll soon come to a locked door. Stand by as it is opened past the Engineer. There are more Drones on the ceiling through the door. Fight your manner to the elevator and step on to consummate the mission.
DOWNLOAD HERE
Halo 3 Finish the Fight Roblox Id TUTORIAL
Posted by: annhatemselithe.blogspot.com


Comments
Post a Comment